- Presentation
- User Management
- Workspace Management
- Access right controls
- Document Management
- Product Management
- Workflow Management
- Check-out / Check-in
- List of values
- Viewer or permalink
- Files Management
- Documents Links Management
- Tags
- Search
- Sharing and publishing
Presentation
PLM (Product Lifecycle Management) is an area of activity whose purpose is to create and maintain products throughout their life cycle, since the establishment of the specification of product and related services until the end of life. (source: Wikipedia)
PLM is a strategy that allows companies to share product data allowing all stakeholders (employees, suppliers, customers, etc…) to act collaboratively on product development.
Beyond traditional PLM functionalities, DocDokuPLM offers to view and collaborate on a digital model (Catia, Inventor, AutoCAD, STEP, IFC, COLLADA, OBJ, etc…) on all kind of terminals (PC, Mac, Linux, Tablet, Smartphone) directly in the browser without any installation or plugins.
In addition, DocDokuPLM proposes advanced functions such as fine grained access right management, document templates or out of the box BPM (Business Process Management) through a graphical workflow editor.
DocDokuPLM is a user friendly, ergonomic tool.
DocDokuPLM User Guide describes and explains how to use the software. It is a comprehensive manual useful for any end users.
User Management
To be able to log into the application, everyone needs an account identified by a login and protected by a password.
Each user which hence represents an actor of the system holds specific access rights for every workspace he belongs to. Users can also participate in business processes.
User creation
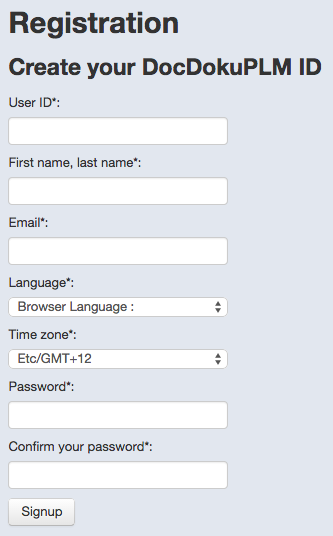
To create an account, click on the link “sign up!” from the home page.

The first step is thus to register. All fields are required.
User edition

Subsequently all settings can be changed, except the User ID which is immutable.
The account edition page is accessible on the “My account” submenu which also allows to reset the password. The time zone is used to display times.

Workspace Management
Workspace creation
Once your account created, you can instantiate new workspaces.
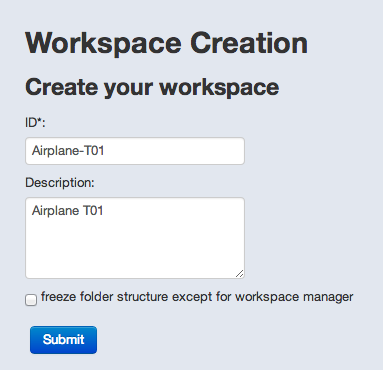
Workspace is the top level context object that gathers documents, parts, business processes and products. The initial workspace administrator is the user who created it.
The “freeze folder structure except for workspace manager” option must be checked if you do not want other users to modify the directory structure.
Workspace settings
To edit the workspace properties, click on “Workspaces administration”.
Then, select the workspace you want to edit.
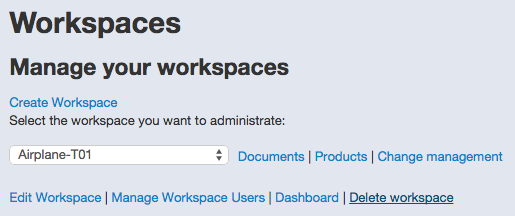
You manage workspaces access at user level or by creating groups. Access rights administration is discussed in the next chapter.
Dashboard
The dashboard provides statistics on your workspace (disk space, number of documents and parts, checkin/checkout per user, etc..).

Collaborative messaging
All users of the same workspace can communicate in real-time with our built-in communication module. This module offers the ability to engage an instant messaging conversation or a video conference on the fly. Hence, users can easily exchange parts and documents and thus speed up the process of product development.
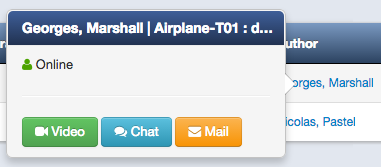
The co-workers menu lists the current connected users (green) and others. A click on the camera icon will start a video conversation.
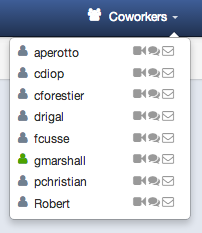
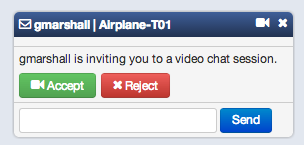
In addition to the co-workers menu, whenever a user name appears in blue inside the application, a simple click brings up a contextual menu. A conversation started this way carries out the context to the recipient user, so he is informed of what is probably the subject of the communication (document, part).
Access right controls
Workspace access rights
User access management
Workspace administrator defines permissions to users which can be either full or read-only access.
It’s also possible to disable users which has the effect to forbid them to log in.

Furthermore, users can be assigned into groups holding the permissions.
A full access user can:
- create, modify or delete documents and parts,
- modify the folder structure (if not restricted to administrator),
- move documents in folders,
- checkin/Checkout documents and parts.
A read-only user can:
- view documents and parts,
- view product structures and digital mock-ups.
A disabled user cannot do anything.
To update user or group access, check the related checkbox and click on the desired action button (remove, disable, enable…) below the list.
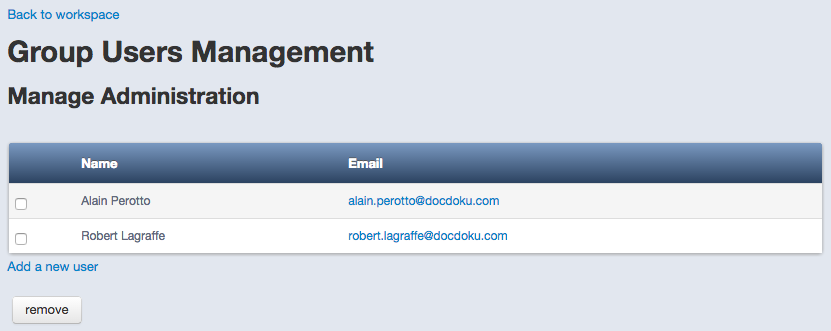
Managing Groups
Groups are useful when the number of users tends to increase. They can hold the same kind of permissions.
Just click on group’s name to open the detail view. You can then add or remove users within the selected group.
Access Control List
Documents and Parts
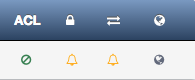
If newly created documents and parts are accessible according to the permissions defined at workspace level, it’s possible to override them by selecting the “ACL” tab. From that panel you can upgrade or downgrade access rights to any user or group in the workspace for the specific item (document or part). The lower level is “forbidden” which means that the item will not be visible by the user or group.

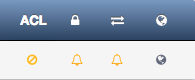
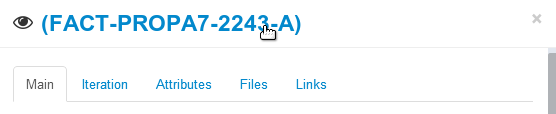
Only the administrator of the workspace and the authors can modify the permissions of existing items. Once you’ve selected an item the following icon appears in the banner at the top.

You can then change the permissions in the same way as creation time.
Items holding specific rights display a prohibition sign at the end of the line. Green means you have full access to the item, yellow means read-only access.
Templates, Workflows, Configurations, Deliverables
If you have full access to a created template (for example), you can change its permissions to any user or group in the workspace. By setting read only permission to a user or group, the user or group will only be able to use it. By setting forbidden permission, the user or group will never see it.
Combined Access Rights
Important concepts:
- Access rights priority order: 1. User rights on a document / part 2. Group rights on a document / part 3. User rights on the workspace 4. Group rights on the workspace 5. Rights of the most permissive group
- Access rights are useless for users disabled on workspace.
- The workspace administrator exceeds these rights.
Below the summary tables of possible combinations.
User present in one group
| Group rights | User rights on Workspace | Effective rights |
|---|---|---|
| full access | read only | read only |
| full access | full access | full access |
| read only | read only | read only |
| read only | full access | full access |
User present in several groups
| Group I rights | Group II rights | Effective rights |
|---|---|---|
| full access | full access | full access |
| full access | read only | full access |
| full access | disable | full access |
| read only | disable | read only |
| read only | read only | read only |
User access rights for a document/part
| User rights on Workspace | User Rights on Document/Part | Effective Rights |
|---|---|---|
| full access | full access | full access |
| full access | read only | read only |
| full access | forbidden | forbidden |
| read only | full access | full access |
| read only | read only | read only |
| read only | forbidden | forbidden |
Group access rights for a document/part
| Group rights on Workspace | Group Rights on Document/Part | Effective Rights |
|---|---|---|
| full access | full access | full access |
| full access | read only | read only |
| full access | forbidden | forbidden |
| read only | full access | full access |
| read only | read only | read only |
| read only | forbidden | forbidden |
Document Management
DocDokuPLM has a document management module that includes a comprehensive versioning system (master, revision and iteration), functions for sharing, publishing documents, treeview and tags organization, ACL configuration… In the following paragraph, we will detail all of these functionalities.
Document template
Document template creation
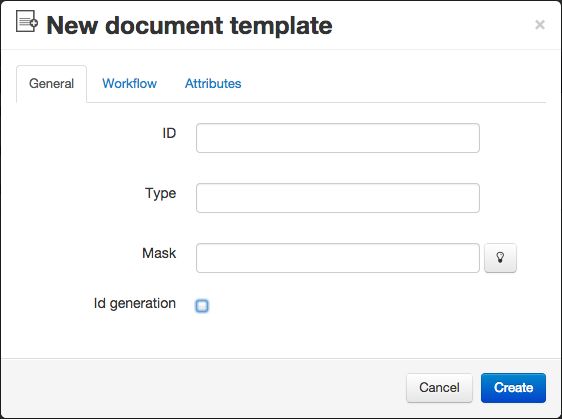
You can create templates that will be used to instantiate documents. You can choose to restrict document naming by filling a mask format. The available characters are the following:
- alphanumeric,
- ’#’ for any valid figure,
- ‘*’ for any character.
Selecting the identifier generation option will lead to an automatic creation of identifiers for documents using the template. If your mask contains figures, then the identifiers will be automatically incremented.
Adding a workflow
Applying a workflow to a template will automatically set the workflow to the new document instantiated with that template.
Adding files and attributes
You can define attribute types in the template and attach files to it. All documents created with the same template will have the same attributes set and attached files. Attribute values will be set on those documents and obviously, files will evolve independently.
Document creation
Each documents must belong to a folder. To create a new document in a specific directory, you must first select the directory then click on the “New document“ button.

When creating a document, you can add attributes, specify a workflow and set specific access rights. Note that you will not be able to upload files or link the current document to another until you finish the creation process.
Once the document is created you can perform the following actions:
- check-in / undo check-out / check-out,
- deletion,
- subscription to document state change notifications, in this case the user receives an email each time a change is made by other users on the document,
- subscription to iteration change notifications, the user receives a notification when there is a new iteration on the document,
- adding tag to documents - for example, classifying a document as important,
- access rights management,
- new version creation,
- public or private document publishing.
Document move
You can move a document to another directory with the below icon. To do so just drag and drop the document from the icon to the targetted folder.

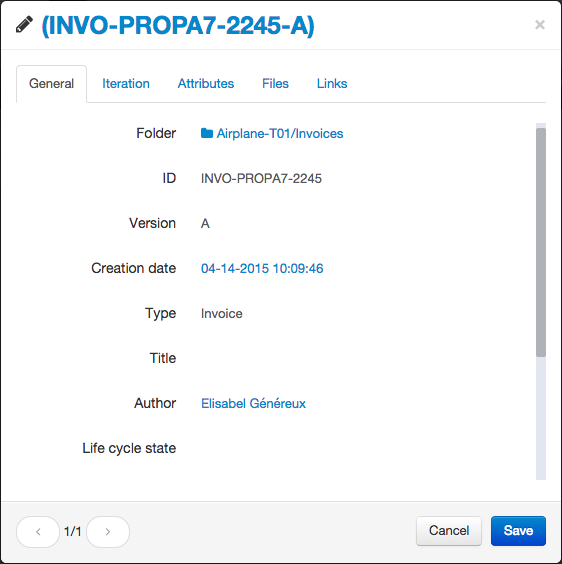
Document modification
In order to modify a document, you must first reserve it. You can access the document modification window by clicking on its title in the list.
The arrows at the bottom left of the window allow you to visualize the different changes done in previous iterations.
You can open the directory containing the document by clicking on the “Folder“ info link.
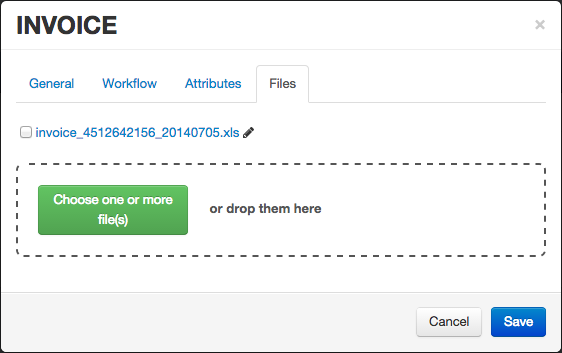
Files tab
This tab allows you to associate files.
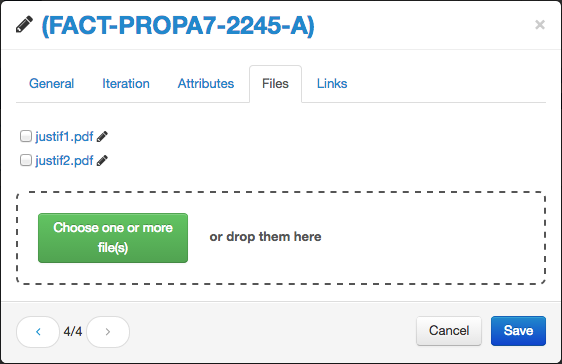
DocDokuPLM generates pdf from files attached to a document. The majority of word processing formats are supported.
Once generated, the pdf file can be opened from the permalink. A front page has been added containing the following informations:
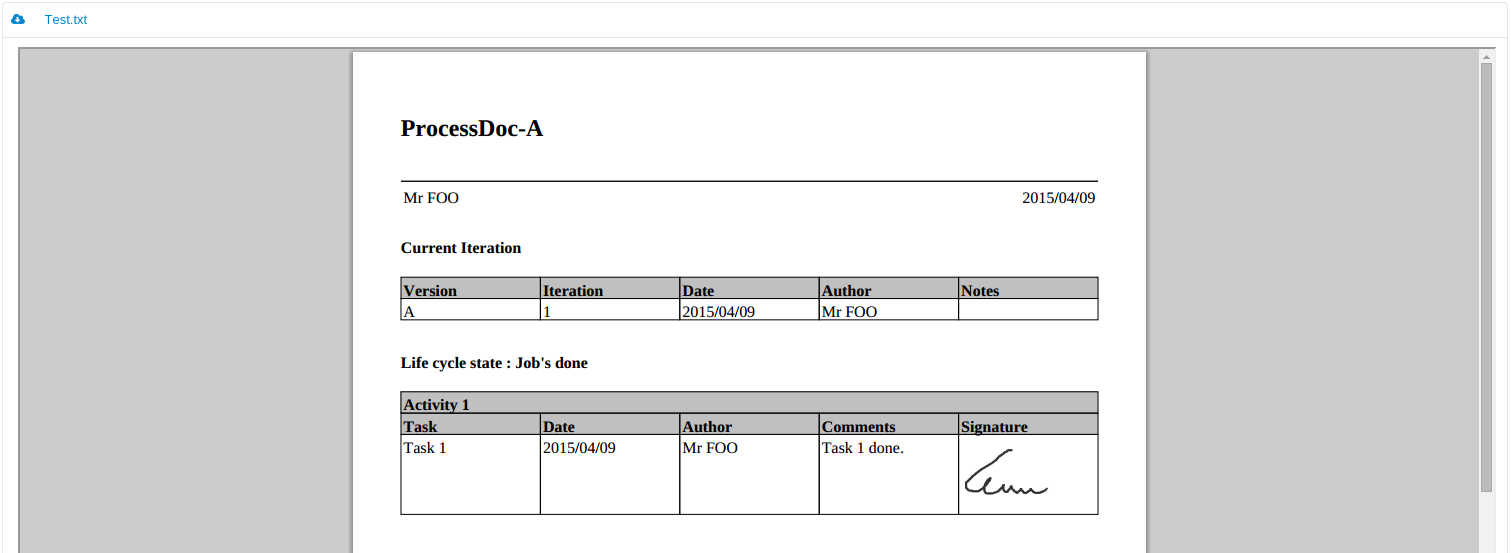
Here is the exhaustive list of supported formats: odt, ods, odp, odg, odc, odf, odb, odi, odm, doc, docx, ppt, pps, txt, csv, xls, pdf, html, htm, xml, rtf, msg.
Used by tab
This view lists the documents and parts using the document as a link.

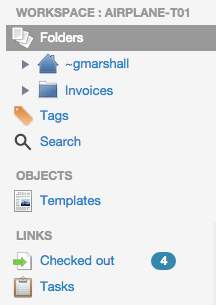
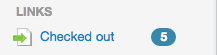
“Checked out” and “Tasks” links
To ensure fast access to documents, you will find two shortcut links in the left menu:
- Checked out: this link displays all the documents reserved by the current user
- Tasks: this link shows the documents the user is directly involved in through a workflow
Product Management
DocDokuPLM is a management system for collaborative product development which purpose is to help members of the same organization create and exchange data around products.
The product management module offers, among others, the following features:
- configuration management,
- product structure exploration,
- 3D digital mock-up visualization,
- parts metadata,
- part-document links.
Parts and products creation is explained below.
Part
Components of products are named parts, they are assemblies if they are made of other parts. Within DocDokuPLM parts can be created from scratch or imported from CAD tools.
Part template creation
Sometimes, it’s interesting to ensure that parts are always filled with predefined properties (workflow, CAD file, attributes) or their reference number respects a given formalism. To enforce such constraints you have to create parts from templates.
Part creation
As seen, part creation panel has an optional template property but there are also several other input fields like name, description, attributes, workflow (see paragraph below) or ACL (Access Control List).
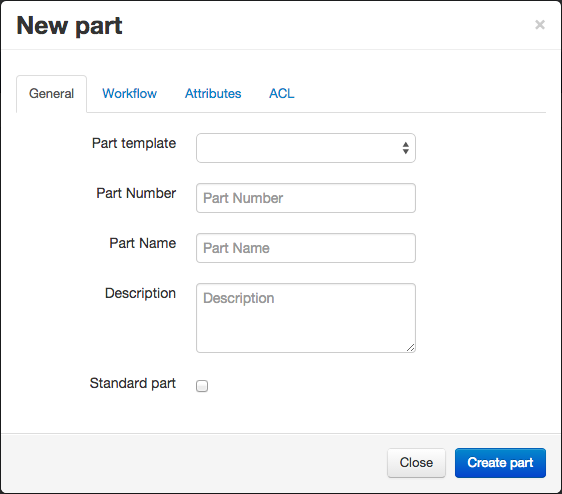
The newly created part will be added to the list.

From the list, a click on the part number will bring the details window to the front. From that screen, you can modify (if you checked out the part) the following elements: attributes, the CAD file and links to documents.
By selecting a part, you can apply a set of actions including:
- check-out / undo check-out / check-in,
- deletion,
- adding tag to parts - for example, classifying parts as important,
- access rights management,
- new version creation,
- release,
- obsolete status to freeze the part iterations (part must be released).
Part Files
This tab allows you to attach files and associate a CAD file to the part. If you choose a CAD file while another was already set, the older file will automatically be replaced with the new one.

DocDokuPLM must convert CAD files to obj format to enable the 3D visualization. This conversion runs automatically after you add the CAD file. If the operation fails, you can retry it manually.
Here is the exhaustive list of supported formats: dxf, obj, off, ply, stl, 3ds, wrl.
You can add textures as well by adding extra attached files as png or jpg. Textures will appear on 3D view.
Part assembly
When modifying a part, you can edit the assembly composition. An assembly is composed of other parts (subparts).
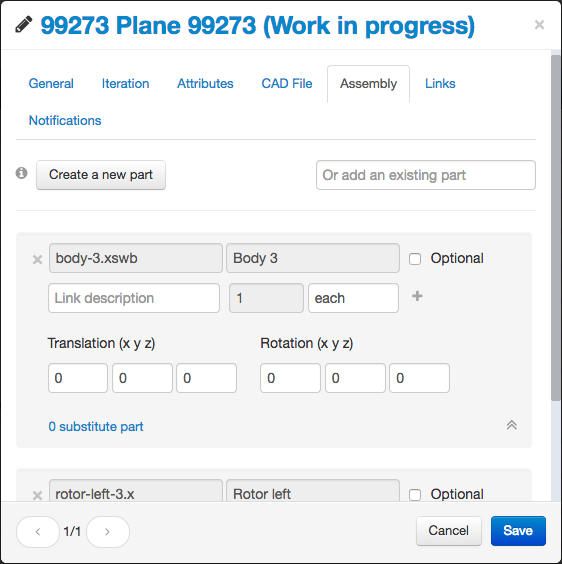
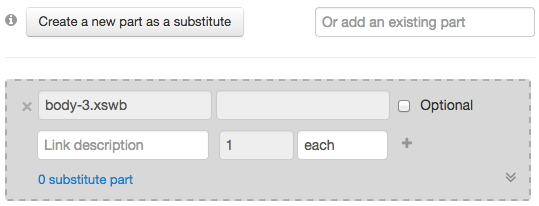
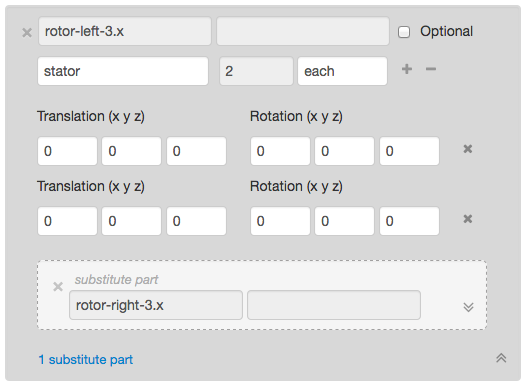
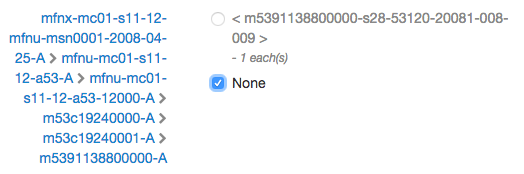
A subpart can be optional and have substitutes. To add substitutes to a subpart, select its view. New actions will appear: create a new part as a substitute or add an existing part.
When added, the substitute will appear inside the subpart view as shown below.
Notifications
Sometimes a change on a subpart may impact the assembly part. The Notifications tab appearing on an assembly part window offers you a subparts changelog overview to help you managing potential impacts.
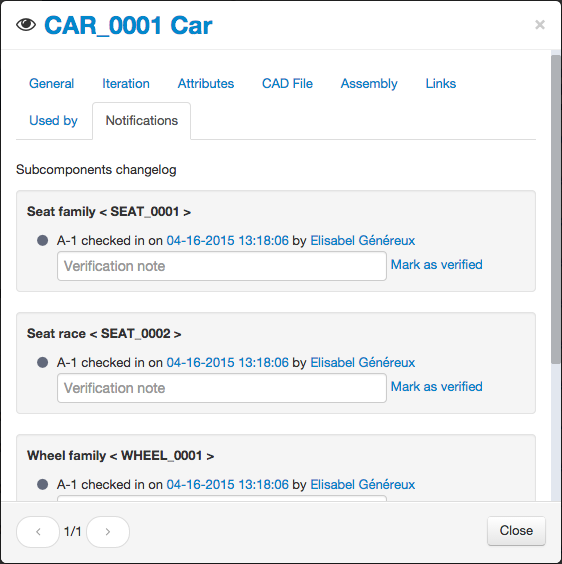
A click on the following icon opens the details window of a part at the Notifications tab.
To mark any modification notification as resolved, click on the “Mark as verified” link next to it.
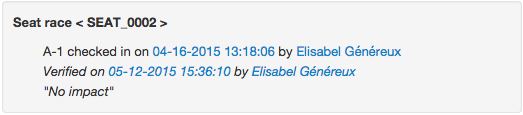
Note: the only way to clear the list is creating a new iteration of the assembly part.
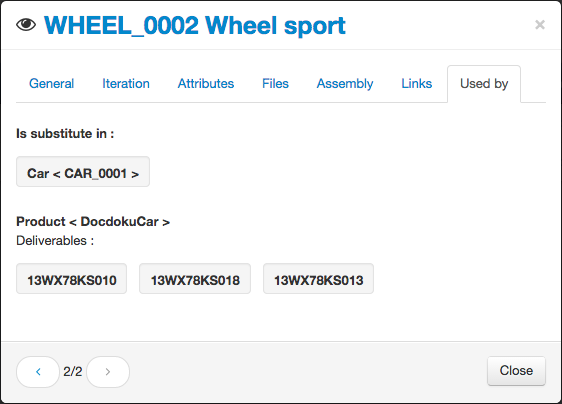
Used by
This view lists:
- the assembly using the part as a sub-component (component or substitute),
- the products and deliverables using the part as a sub-component (root part, node or leaf).
Query builder
If you want to display a custom list of parts, go to the query builder from the following button:

With the displayed view:
- you filter the parts list by products and / or deliverables,
- you select which field you want to display (for example part number, part name, attributes…),
- you include or exclude parts with where clauses (at least one must be defined),
- you order and group the parts in the result list.
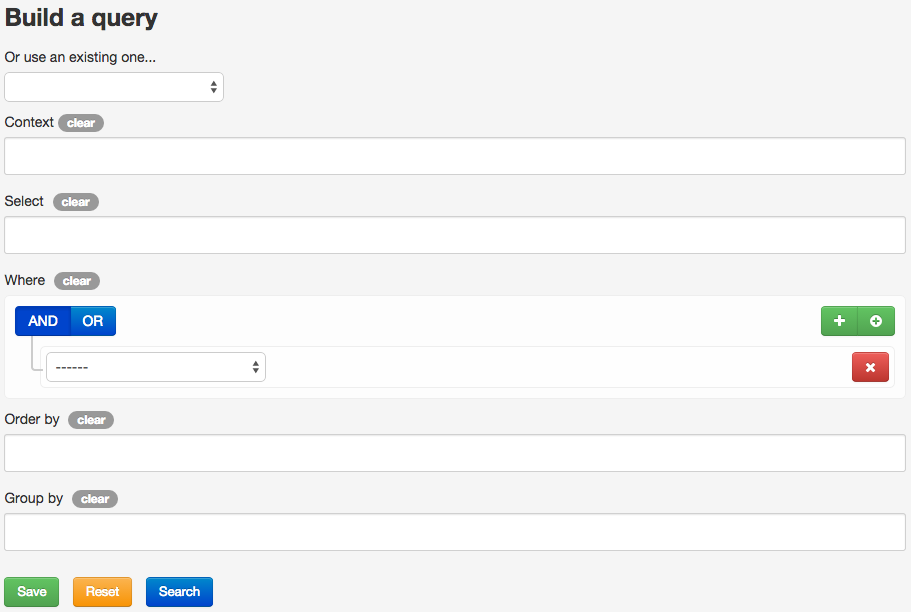
If you save the query and select it, you can export the results to an Excel file. This feature is very useful to get bill of materials.
Filters
There are two sort of filters:
- part filters,
- context filters.
The part filters allow you to filter on part master/revision data, such as:
- part number,
- part name,
- author,
- part iteration attributes,
- and other parts related data.
The context filters appears only when a deliverable context is added to the select clause.
These filters allow you to filter the result list within deliverable data attributes. They act as a second filter (post filter), and behave like a “AND” condition with the part filters.
Note: context filters will appear only if there are existing deliverable data with attributes
You are allowed to use no filters (match all query), or only one of them.
Operator attributes
There are different available operators depending on the attributes you want to filter on.
Text attributes
Text attributes have the following operators:
- equal / not equal,
- contains / does not contains,
- begins with / does not begin with,
- ends with / does not end with.
Number attributes
Number attributes have the following operators:
- equal / not equal,
- less / less or equal,
- greater / greater or equal,
- between.
Date attributes
Date attributes have the following operators:
- equal / not equal,
- less / less or equal,
- greater / greater or equal,
- between.
Long text attributes
Long text attributes have the following operators:
- equal / not equal,
- contains / does not contains,
- begins with / does not begin with,
- ends with / does not end with.
Boolean attributes
Boolean attributes have the following operators:
- equal / not equal.
Part number attributes
Part number attributes have the following operators:
- equal / not equal,
- contains / does not contains,
- begins with / does not begin with,
- ends with / does not end with.
List of values attributes
List of values attributes have the following operators:
- equal / not equal.
URL attributes
URL attributes have the following operators:
- equal / not equal,
- contains / does not contains,
- begins with / does not begin with,
- ends with / does not end with.
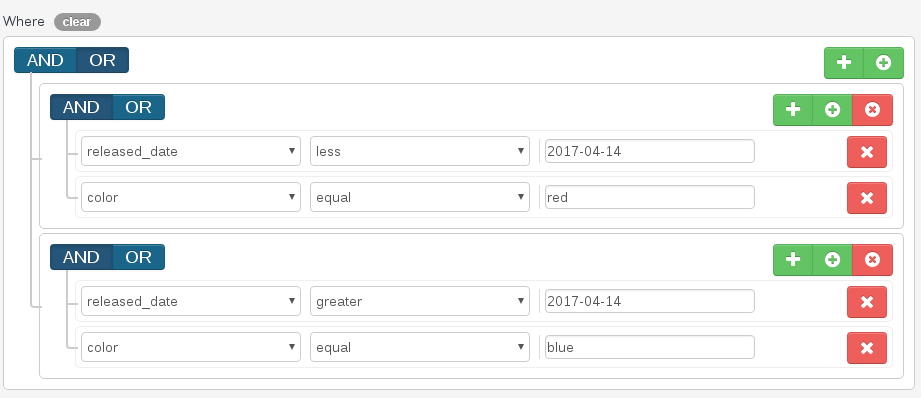
Advanced filters usage
You can compose and combine filters. There are no limit on the amount of combinations.
There are two buttons on each rule:

To add a rule in the current rules group, clic on the first button. To add a rules group in the current rules group, clic on the second button.
Saving and exporting queries
Saving queries
You can save the current view by clicking on the save button at the bottom of the query builder. Your query cannot be saved if it’s not valid. Once saved, they are visible for all users in the workspace.
These queries will appear in the select menu at the top of the query builder. Once you select a query from this list, all fields are automatically set.
Queries can be deleted by clicking the delete query button.
Exporting queries
You can export the current view by clicking on the export button at the bottom of the query builder. A .xls file will be downloaded automatically.
You can export a saved query by clicking on the export button near to the query select menu (does not take into account the current view).
Quick links
You have a fast access to your checked out parts in the left menu.
Product
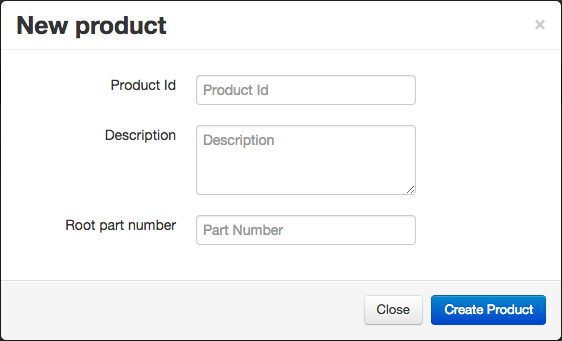
Product creation
The creation of a product involves supplying an identifier and a part number, filling a description is optional.
The part number designates the root part of your product. It can be a simple part or a parts assembly.
The new product will be added to the product list. Selecting an item from that list proposes two actions: deletion and baseline creation.
Configuration
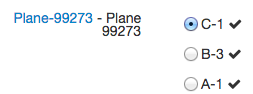
A configuration is a list of assembly choices for a given product. Indeed you may want to:
- choose between a part or one of its substitutes,
- choose nothing, if a part is optional.

2 configuration types are offered:
- latest checked in, to include the last checked in iterations of each implicated part,
- latest released, to include automatically the last released versions of each implicated part.
Baseline
Baselines are kinds of snapshots of the entire product structure at a given time so you can manage different versions of the same product.

If the chosen configuration type is “Latest released” and several versions exist for articles, then the Versions tab gives you the opportunity to select an older version.
Furthermore the Configuration tab offers you to choose a specific configuration. This will prefill for you all configuration choices but you can edit those by yourself in the Choices tab.
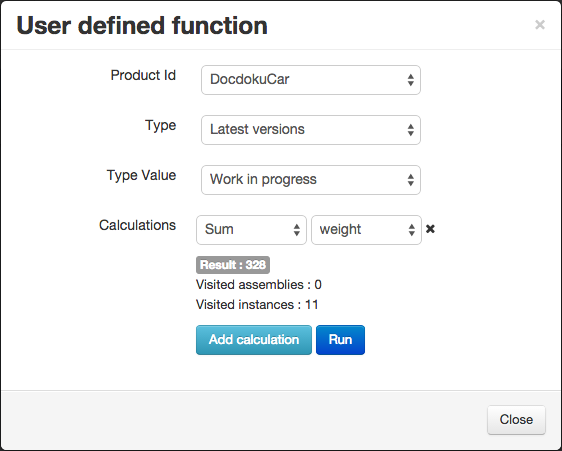
User defined function
You may want to run calculations on every part of a product or baseline, for example determine its total price. This feature is available by blicking this button:

The calculation can be a sum or an average. You choose which attribute will be used for calculation (below the weight). If the attribute is not defined on a part, the part is ignored.
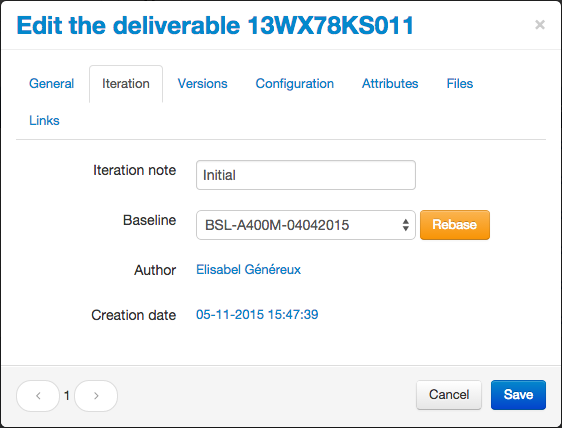
Deliverable
A deliverable is a product instance based on a product baseline and identified with a serial number.
When creating a deliverable, you can add attributes and set specific access rights. Note that you will not be able to upload files or link the current deliverable to a document until you finish the creation process.

To keep different versions of a deliverable, simply create new iterations by clicking the “Rebase” button. This button allows you to change the baseline if you really need to.
Export files in a zip
To share product files with external users or simply keep a local copy on your disk, you will find a very useful feature on product / baseline / deliverable lists items.
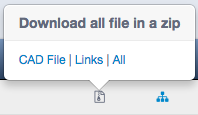
You can choose:
- to only export CAD files,
- to only export files from linked documents,
- to export any files from parts and linked documents.
If you export the files of a product, you will obtain the files attached to the last iterations of each parts and documents. Otherwise, you will get the files attached to the baselined iterations.
Product structure explorer
Click on the above icon to display the product/baseline/deliverable structure.

The product structure is a breakdown showing the various items that compose a product. It is displayed as a tree view where each node represents an assembly which is expandable.

The node itself is clickable in order to display its subparts as a list. And a click on the icon right to the node opens the node’s main properties.
Available actions on a tree:


Available information on a part:


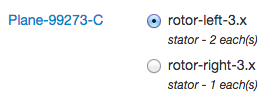
Configuration specifications
You can change the explorer specifications. Look at the top left menu under the search bar. You will find 3 exploration modes:
- “Latest versions”, to look a the product structure. Here the submenu lets you choose between different part status (work in progress, latest checked in and latest released).
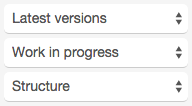
- “Baseline”, to look a baseline structure. Here the submenu lets you choose a baseline of the given product.

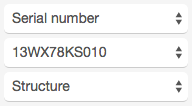
- “Serial number”, to look at a deliverable structure. Here the submenu lets you choose a deliverable.
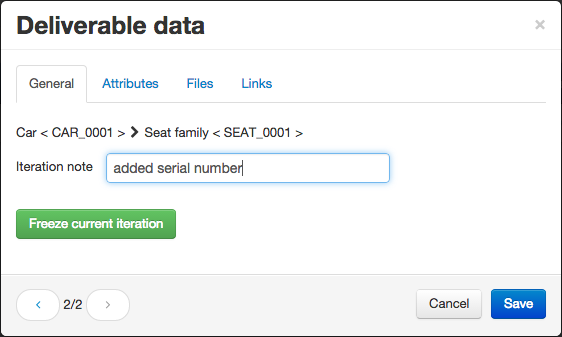
Path data
You may want to associate specific data with a deliverable part (like a serial number attribute for instance). This feature is available and accessible through the deliverable structure explorer. Simply click on the checkbox next to the part to display the following button:
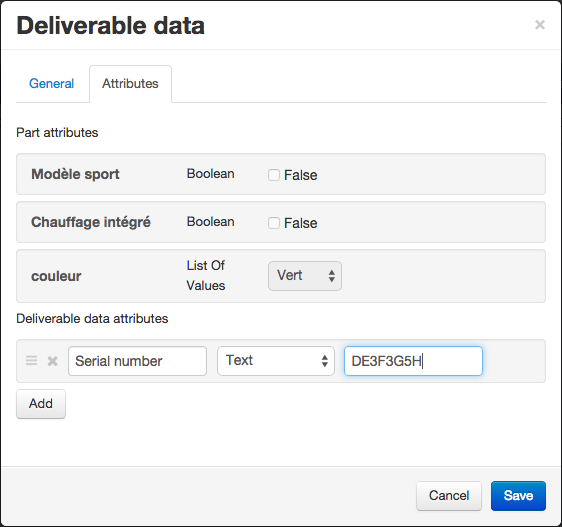
During path data edition you can manage attributes, files and document links. Furthermore, it is possible to freeze your modifications if you want to keep a change history by clicking on the “Freeze current iteration” button. This operation will freeze the iteration and create a new editable one.
If a part has defined deliverable data, the following icon shows up on the tree view next to it:

Typed link
In a product, you need occasionaly to link parts to each other in a different way. Then you will use typed links. Those links help you define new structures to the product, for instance highlighting electrical connections between parts.
Check 2 different parts in the product structure to show the following button:

By clicking on that button, you add the link defined with an existing or a new type. This type will be then useful to display the new defined product connections:

Any link can be edited and removed.
Part search bar
Sometimes, especially for complex products, locating a part in the tree could be cumbersome. Look at the above example. To facilitate this operation, there is a search bar on the top left allowing you to easily find a part from its number or name.

As an alternative, you can select the part directly on the 3D scene.
Product 3D scene
Click on the above icon to display the product/baseline/deliverable 3D scene.

One click on a 3D object selects the results on the left hand panel. The associated part and all its ancestors will be highlighted in yellow. Moreover the part properties are displayed in the right hand panel. This feature is useful when the user wants to find a part he ignores the number.

By switching a part to ON/OFF on the tree, you display/hide the part on the scene view.

The possible actions in the 3D visualization mode are:
- creating markers to report a design issue for example,
- creating layers that hold a set of markers,
- export 3D visualization of a part. Produces the html code to embed in other web pages (like YouTube or Google Maps),
- measure of the distance between 2 points.
Workflow Management
A workflow is a representation of the various tasks that need to be completed and their interactions. These operations are assigned to different users belonging to the same workspace and are related to an identified document or part.
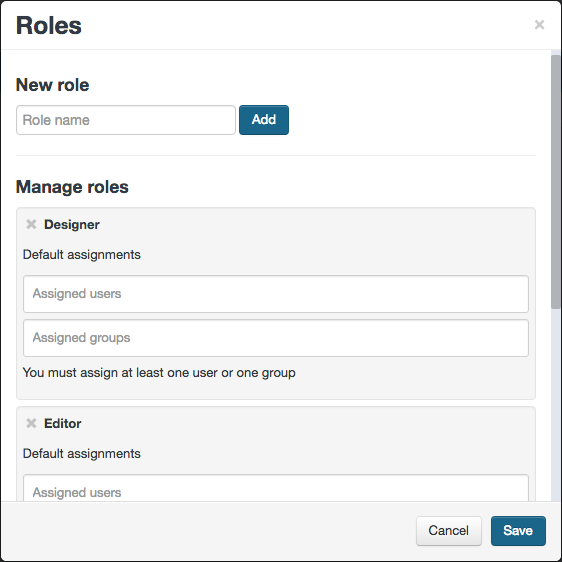
Roles
DocDokuPLM workflows are role-based. This means that to increase the applicability of any workflow model, task assignees are not expressed directly by user names but rather by roles.

Thus, the first step involved in workflow creations is to define the roles used inside the workspace. These roles can optionally be mapped to a default user or group assignee. Anyway, when the workflow model is instantiated and attached to a document or a part, we will have the opportunity to refine those mappings.
Workflow
Workflow template
A workflow template (or model) lists several activities from an initial state to a final state. Each activity contains a label naming its intermediate state and a list of tasks to complete. Those tasks can be performed sequentially or in parallel.

For a sequential activity, the tasks are performed sequentially. If one task is rejected, the current activity is stopped.
For a parallel activity, the tasks are simultaneously open and as a consequence can be closed in any order. A rejected task does not necessarily lead to stop the current activity. In effect, parallel activities have an additional property which is the number of done tasks needed to progress to the next activity. This number ranges from 1 to the total number of tasks.
Validating an activity results to start the next one. Invalidating an activity results in the suspension of the entire workflow.
In case of an unvalidated activity, the workflow will go on the recovery activity if one has been previously defined.
A workflow template can be changed at any time. That will have no incidence to the already instantiated workflows.

When editing a workflow, you can duplicate it by clicking on the following button:

Then simply enter a name for the new copied workflow.

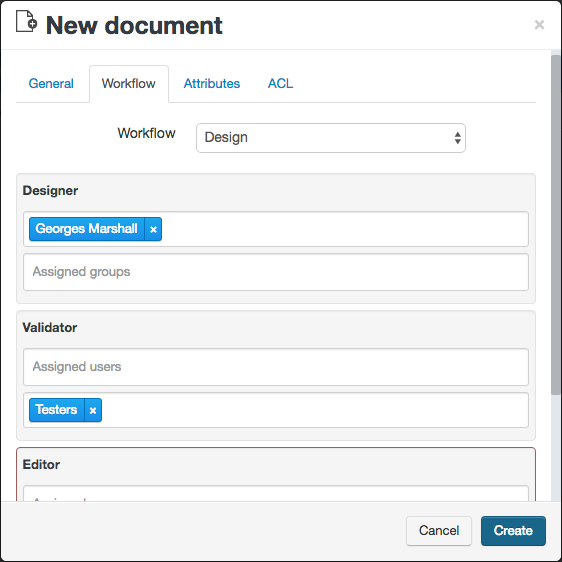
Workflow instance
When creating a document or a part, the author can choose the workflow template he wants to apply. All the implied roles can then be respecified.
Once the document or part has been created, the associated workflow (if any) starts on the first activity. When a task has been opened, a mail is sent to the current task responsible user so he can approve or reject it and sign. If a group was assigned to the task, then the mail is sent to all of its users.
Lifecycle state
Once an activity is started, every task assignee receives a mail which includes a full description of the task to complete.
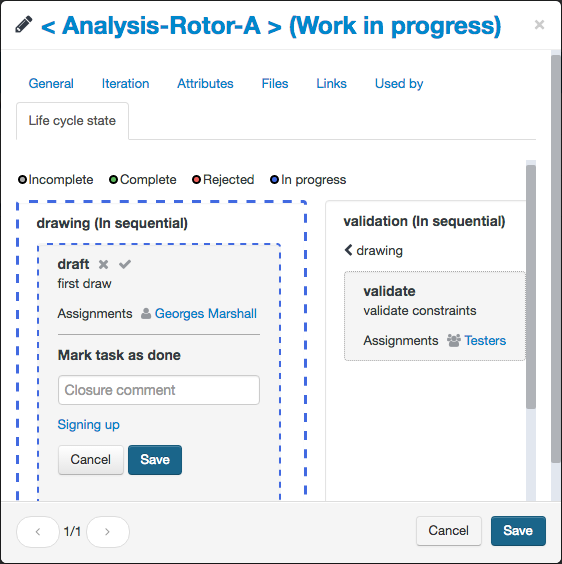
A running task can be marked as done or rejected if:
- the responsible of the task has downloaded at least once an associated file,
- the document or the part is released (not checked out).
By clicking on the “Signing up” link, you will be able to add a signature block.
All the users who have subscribed to state change notification will be informed by email.
There is no way to update or reset a stopped workflow assigned to an item. The only way to relaunch it is creating a new version of that item and assign it the same workflow.
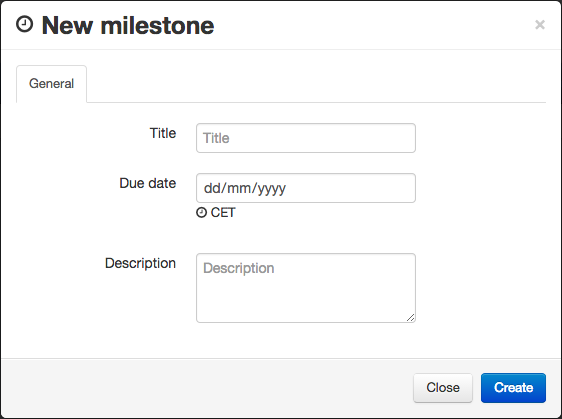
Milestone
Milestones allow you to define deadlines for your jobs in progress.
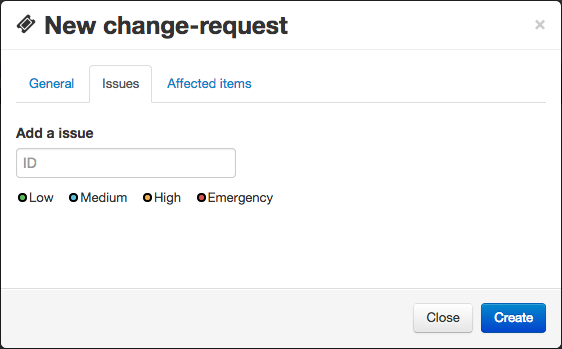
Issues
This page allow you to reoprt issues with specific priority about your projects. An issue fix can:
- be affected to a user,
- concern documents and / or parts that you add in tab “Affected items”,
- belong to a category.
List of available categories: adaptive, corrective, perfective, preventive.

Requests
Change requests work exactly the same as issues. You can furthermore reference issues.
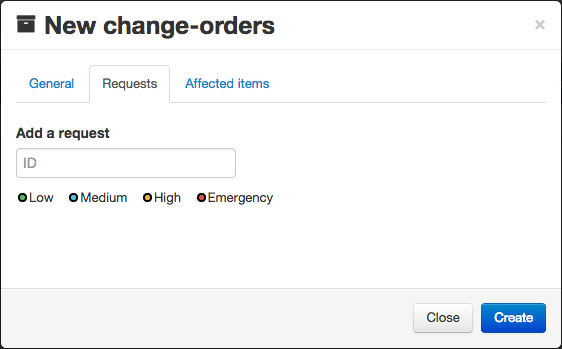
Orders
Change orders work exactly the same as issues. You can furthermore reference requests.
Check-out / Check-in
To lock a document/part to prevent modification, just select it and press the check-out button. A new item iteration will be created. You can select multiple items to proceed faster.

A checked out item cannot be edited by other users and appears to them as locked. To validate the modifications you will have to check it in. Otherwise, you can cancel the changes with the undo check-out action.
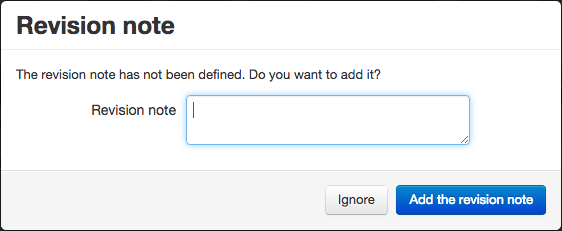
While releasing (check-in operation) the item, you have a chance to enter an optional revision note. If you do not want to fill a note, press the “Ignore” button.
All these actions can be performed in the “Iteration“ tab on the item details window.

The revision date indicates the check-in date if the item is checked in or the check-out date if the item is checked out. And the modification date shows the last date when the item was last modified (including the revision note).

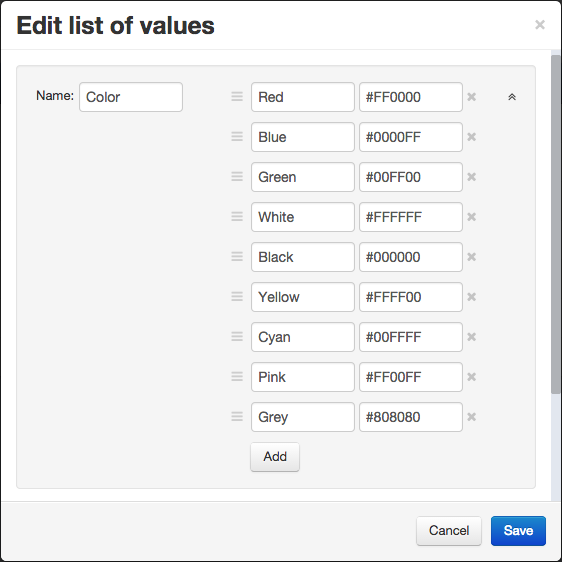
List of values
DocDokuPLM allows you to predefine values of attributes, called list of values, you will then be able to use as attributes for a document, a part or a template. To create or edit values, click on the following icon shown on the templates page:

For example, you can create attributes values dedicated for colors.
Once saved, the list is accessible through the Attributes tab of the template/item detail window. By attributing a list of values to a template/item, you create a new instance of this list.

You will not be able to:
- delete a list of values which has instances,
- edit an instance of list of values.
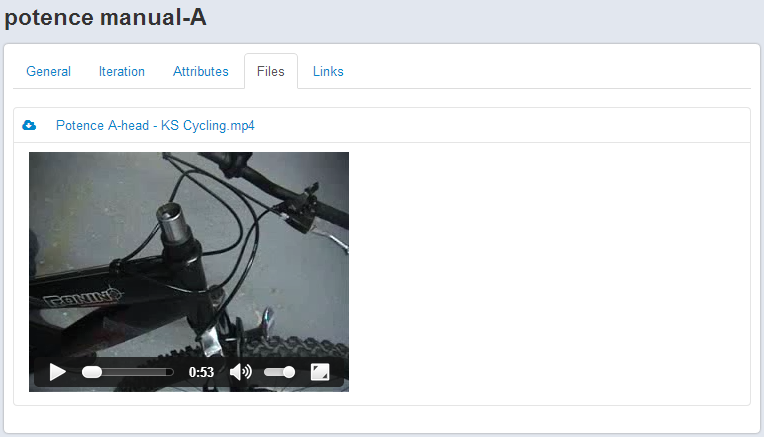
Viewer or permalink
Each document/part provides a permanent link where you see details of its latest revision. To get there, you should simply click on the title of the item window.
You can explore all properties of the item as well as visualize its attached files. The viewer supports a large number of formats: pdf, jpg, mp4, doc… Files not supported by the viewer will be downloaded.
Files Management
A click on the following icon opens the details window of a document/part or a template at the Files tab.
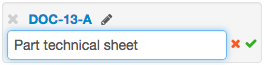
Any file - associated with any item or template - can be renamed by clicking on the small pencil. The new title will be registered only if you click on the check button.

You can download a file by clicking on its name and delete files by selecting the related checkboxes.
Do not forget to press on the modal Save button to validate your modifications.
Documents Links Management
You can easily add references to documents during part/document edition. Links can be managed in the “Links“ tab on the item modification window.
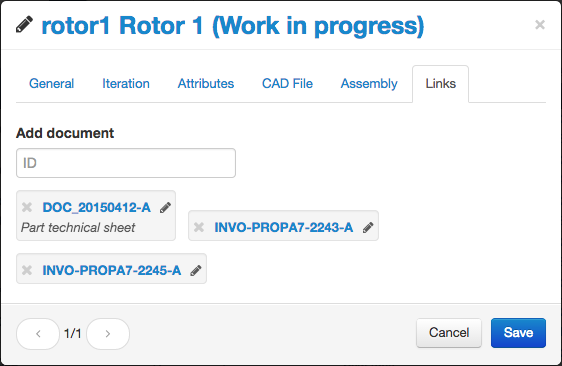
You comment a document link by clicking on the small pencil. The comment will be registered only if you click on the check button.
Tags
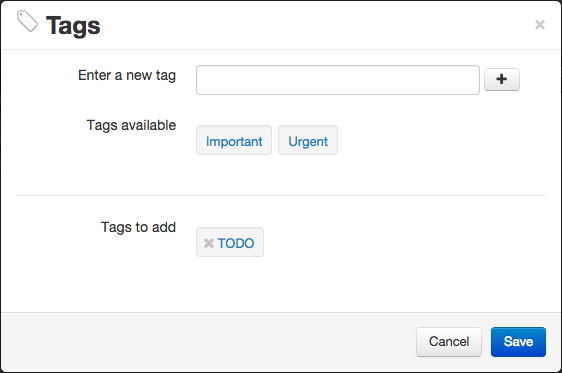
You have the possibility to tag documents, parts, issues, requests and orders. To do so, select one or more items and press the tag icon:

From the tag management window, you can affect existing tags or new ones.
To display the items associated with a specific tag, select that tag from the left menu.
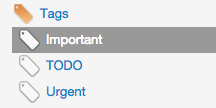
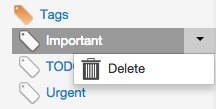
You can delete a tag by clicking on the right arrow into the area of the tag, then click on “Delete”. The tag will be removed but the associated items will not.
Search
We distinguish two types of search: quick and advanced.
Quick search
The quick search bar appears on top of the documents/parts list. It lets you quickly find an item from its name, type, identifier, version, author, creation date, modification date, attributes, files content.

Advanced search
There are two ways to get access to the advanced search:
- through the “Search” link from the left menu, only for documents,
- through the small arrow from the quick search bar.
This advanced search allows you to find an item from multiple input texts about its:
- name,
- type,
- identifier,
- version,
- author,
- creation or modification date,
- attributes,
- files content.

Sharing and publishing
Publishing
Each document/part can be published. To do so, click on the right icon on the item table row.

The following window will appear:
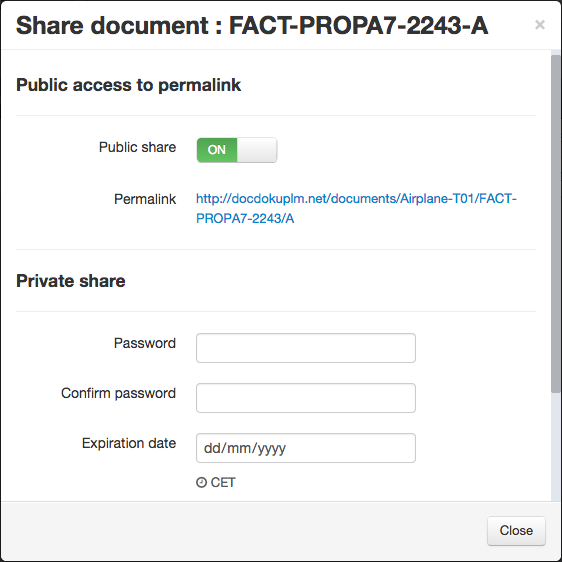
By activating the public share, the item is publicly accessible from the Internet.
Private access
You may also want to generate a private link optionally protected by a password or an expiration date. For that, just fill the password and/or expiration date and push the share button.
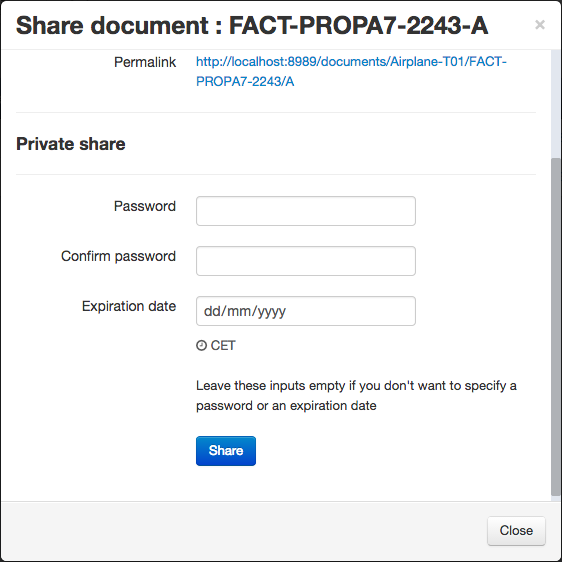
The generated link is obfuscated, it cannot be guessed.
